
Welcome part one of my basics geared at helping miniature painting beginners who want to paint figures for gaming or display. This topic has been covered before in the past by many others but I want to give my 5 cents!
This article is meant to accompany this video for even faster reference. It is also meant to build upon the article on Shape and Light and the next article on Feathering. You can also find all of Pirate Monkey’s tutorials here!
If you liked this article and want to see more in depth tutorials come check out Pirate Monkey Painting’s Patreon!


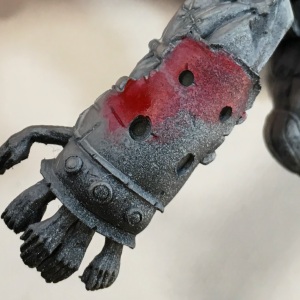
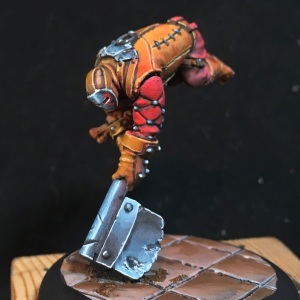
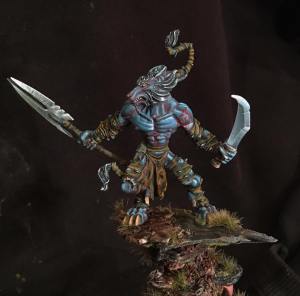
Before and after intense glazing.
We don’t want to delve to deep into theory at this point but It’s important to make a couple notes. Glazing was originally used and still is used to tint, add or change color whole areas by using thin paint check it out in this video at minute 7 . As miniature painters we also do this with glazes but because the surfaces we work on are so small we can actually use this thinned paint to build highlights and shadows relatively quickly in many small thin layers. (below image) We can also use glazes clean up areas where the transition is to rough or sharp. (above image)
Now we get to the how to! The first question that inevitably comes up with this technique is “How much water to I use to thin?” There is no right answer to this it really is a feeling. Add as much as you need to and if you add too much add some more paint but TEST, TEST and TEST.
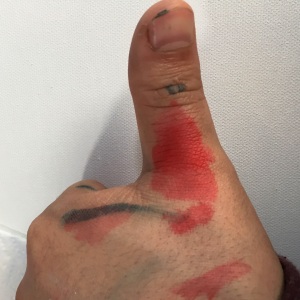
Personally brushing some paint on my hand or thumb to see how transparent the paint is. The other reason the hand is prefered is that if we’re continually testing we can see what the new glazes of paint will look like over the old before we place the paint on the miniature
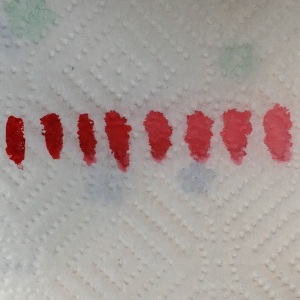
Others fully load the brush and let a paper towel absorb the water and pigment to get a feeling of the thinness. Some feel that this takes away more liquid and leaves more pigment on the brush. The difference is nominal but play around with it.
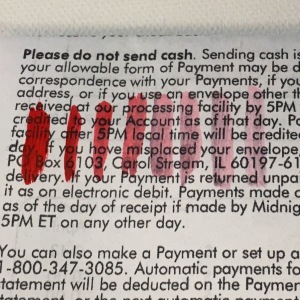
Lastly some use newsprint or any other paper printed surface to wipe the brush over if you can see the colors and the print it is thin enough.
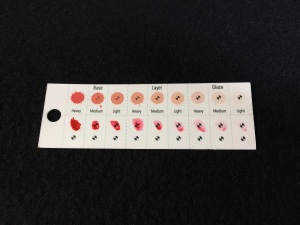
MOJO also sells these super handy tools for measuring how thin the paint is and I wanted to show you that as well as its great for painters of all experience levels!
(https://www.benkomets.com/shop/)
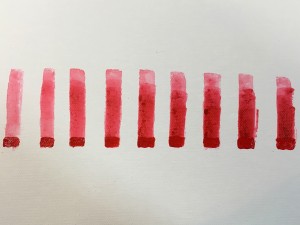
There are two methods for application. The first involves a damp brush, you will know you have removed enough liquid when you drag the brush along a surface and there is no pooling. This one has the most control because it is the least random. It is also the most tricky to get down though because it takes practice to get the correct amount of liquid off of the brush
The second method is one where you push the little pool again and again to achieve a contrast or smooth a transition. This one has less control out of the two but once proficiently learned can be extremely effective.
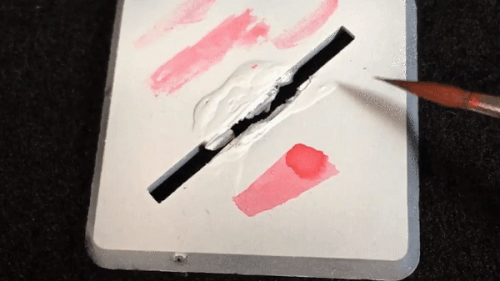
After each brushstroke wait for the paint to dry then apply again. You may not need to always reload the brush after every brushstroke.
The photo above shows 3 layers of glazes with both methods. as you can see there is a build up opacity from the push layering were as the other method has just tinted the surface.
Finally it is very handy to have a hair dryer on hand as you can quickly dry a piece and apply the next glaze. The model can also slightly be heated up by the hairdryer and this will cause the next glaze to dry more quickly. Finally you can just leave the hairdryer running so that you can glaze dry quickly and then glaze again. This not only keeps the figure warm but dramatically speeds up the process (Thanks for this one Banshee).
WARNING… if you do this with resin models it may start to melt the figure, so be careful.
If you prime in a Zenithal way they you can use the highlights created by the white primer to your advantage by simply issuing a glaze to tint the surface. Once a couple of thin coats are put down using the first method the second push method is used to start to push away from the highlight zone and just like that you have a fantastic looking highlight. After the transition is forming you can start to use different colors in your shadows
Lastly you can use glazes to add color interest in a slow and controlled way by slowly brushing on the new color until your happy. This is particularly handy when you want to add color to your shadows or just to add a little bit of nuance anywhere you want!
That in a nutshell is glazing!
I hope that the Gifs have been helpful. it’s another thing entirely to see the progression happening in front of you instead of just a still photo. Let me know if you liked them! Cheers and more later!
Here are some more awesome resources
The Original MV Glazing tutorial (Roman Lappat)
http://massivevoodoo.blogspot.co.uk/2009/12/tutorial-working-with-glazes.html
(Large scale fine art example)
http://guidetooilpainting.com/glaze.html
-Miniature scale example (Ben Komets)
-(Large scale fine art example) Lachri

8 thoughts on “Pirate Monkey Basics – Glazing”